Let’s face it. Nowadays, management absolutely loves BI. Especially when there are lots of pretty charts and graphs. The thing is I’m not a BI guy. Cubes scare me to death. Luckily, there is the new snazzy Chart Web Part in SharePoint 2010 that gives you some BI like capabilities. It doesn’t allow you to drill down and pivot and do all that fancy stuff, but it does let you make some nice graphs and charts that any ordinary developer can do.
To get started, first you need an Enterprise version of SharePoint 2010. Unfortunately, I used the key that was later determined to be the wrong one which led me to reinstall SharePoint with a new key. If you don’t have any Enterprise options available, then you will be reinstalling. Assuming, you do have an Enterprise key, you then need to activate the SharePoint Server Enterprise Site Collection Features.
This adds the chart web part (among other things). Then edit any page and add a Chart Web Part. You can find it under Miscellaneous as of Beta 2 (they may have found it a new home in later versions).
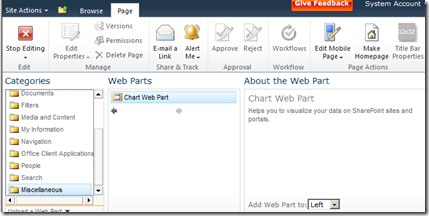
When you add it to the page, it uses some dummy data and displays a simple bar chart.
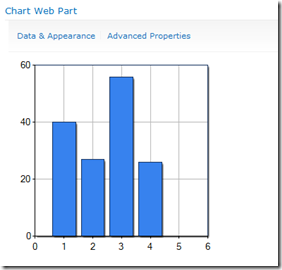
At this point, you might be asking yourself “What kind of data can I bind this to?”. By clicking Data & Appearance, you will see the following screen which leads you to links to customize the appearance or bind to data.
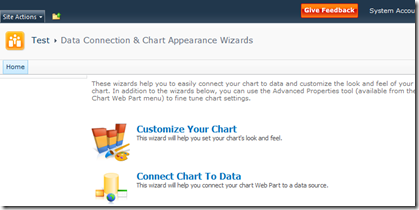
We’ll start by going to Connect Chat To Data. Look at these great options we have to choose from.
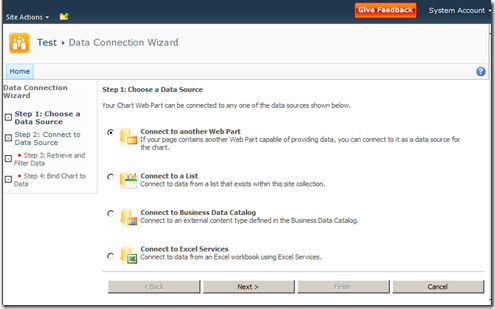
We can connect to another web part, a list, an external content type (looks like they need to update the BDC wording they have there), and to Excel Services. I tried going straight to an external content type, but I got a yellow screen. Apparently that is broken on my version, but I’m sure it will work in RTM. There is a work around though. You can pick an external list using the Connect to a List option. This is exactly what I am going to do.
Remember that external list I created on my BCS blog post? I’m going to use that list and extend it some. What I did is I created a new custom list to contain Monthly Sales information. I used an External Data field to allow the user to pick a product from the external content type and enter in some sales data in a field.

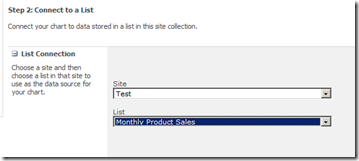
This is the list we are going to use on our chart. On the next step of the wizard, we are allowed to pick a list. Note that it also allows you to choose other sites in the collection as well.
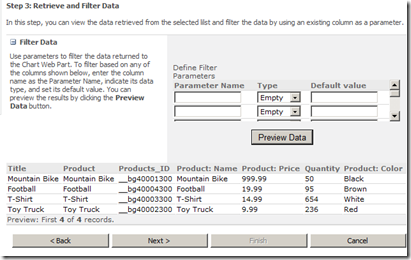
The next step allows you to filter your data first if you are so inclined.
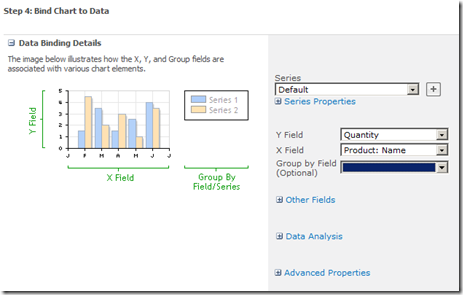
The Chart Web Part has a ton of configurable options. On this last step is where you will start seeing some of them. The main thing to set here is your X and Y fields. You can also specify something to group by as well.
Once you finish this last step, you’ll get something that looks like this.
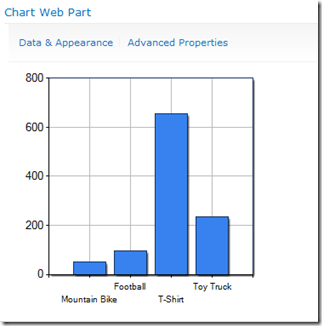
So, what we have here is a chart bound to data coming from a database (via external content type) and a SharePoint list. Pretty cool, right? I think so. It gets better though. What if your boss doesn’t like bar charts? No problem. There are tons of chart types to choose from. Just click on Data & Appearance again and then Customize Your Chart. Look at all of these built in chart types you have.
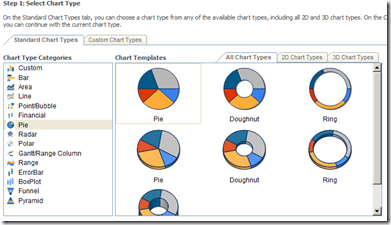
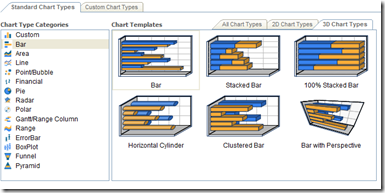
On the next step, you can further customize the chart you choose. It has some nice pre-built color themes and you can customize the size and what not. It also gives you a live preview as you change settings.
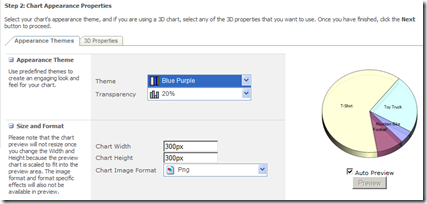
Here is what my new chart looks like.
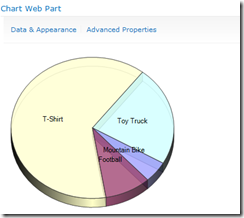
You can customize things even more by going to Advanced Properties. It would probably take me a week to show you everything that this web part does, so I recommend you go try it out for yourself. The charts and graphs this thing produces are so cool, you should have no issue getting your boss to sign off on the Enterprise license. :)